
27
Extrusion International 1/2017
Technologies for diameter measurement of hoses and tubes
For the measurement of the product diameter of hoses
and tubes, two established techniques are used: the
“Scanning System” as well as the “CCD line sensor tech-
nology”.
„Scanning System“
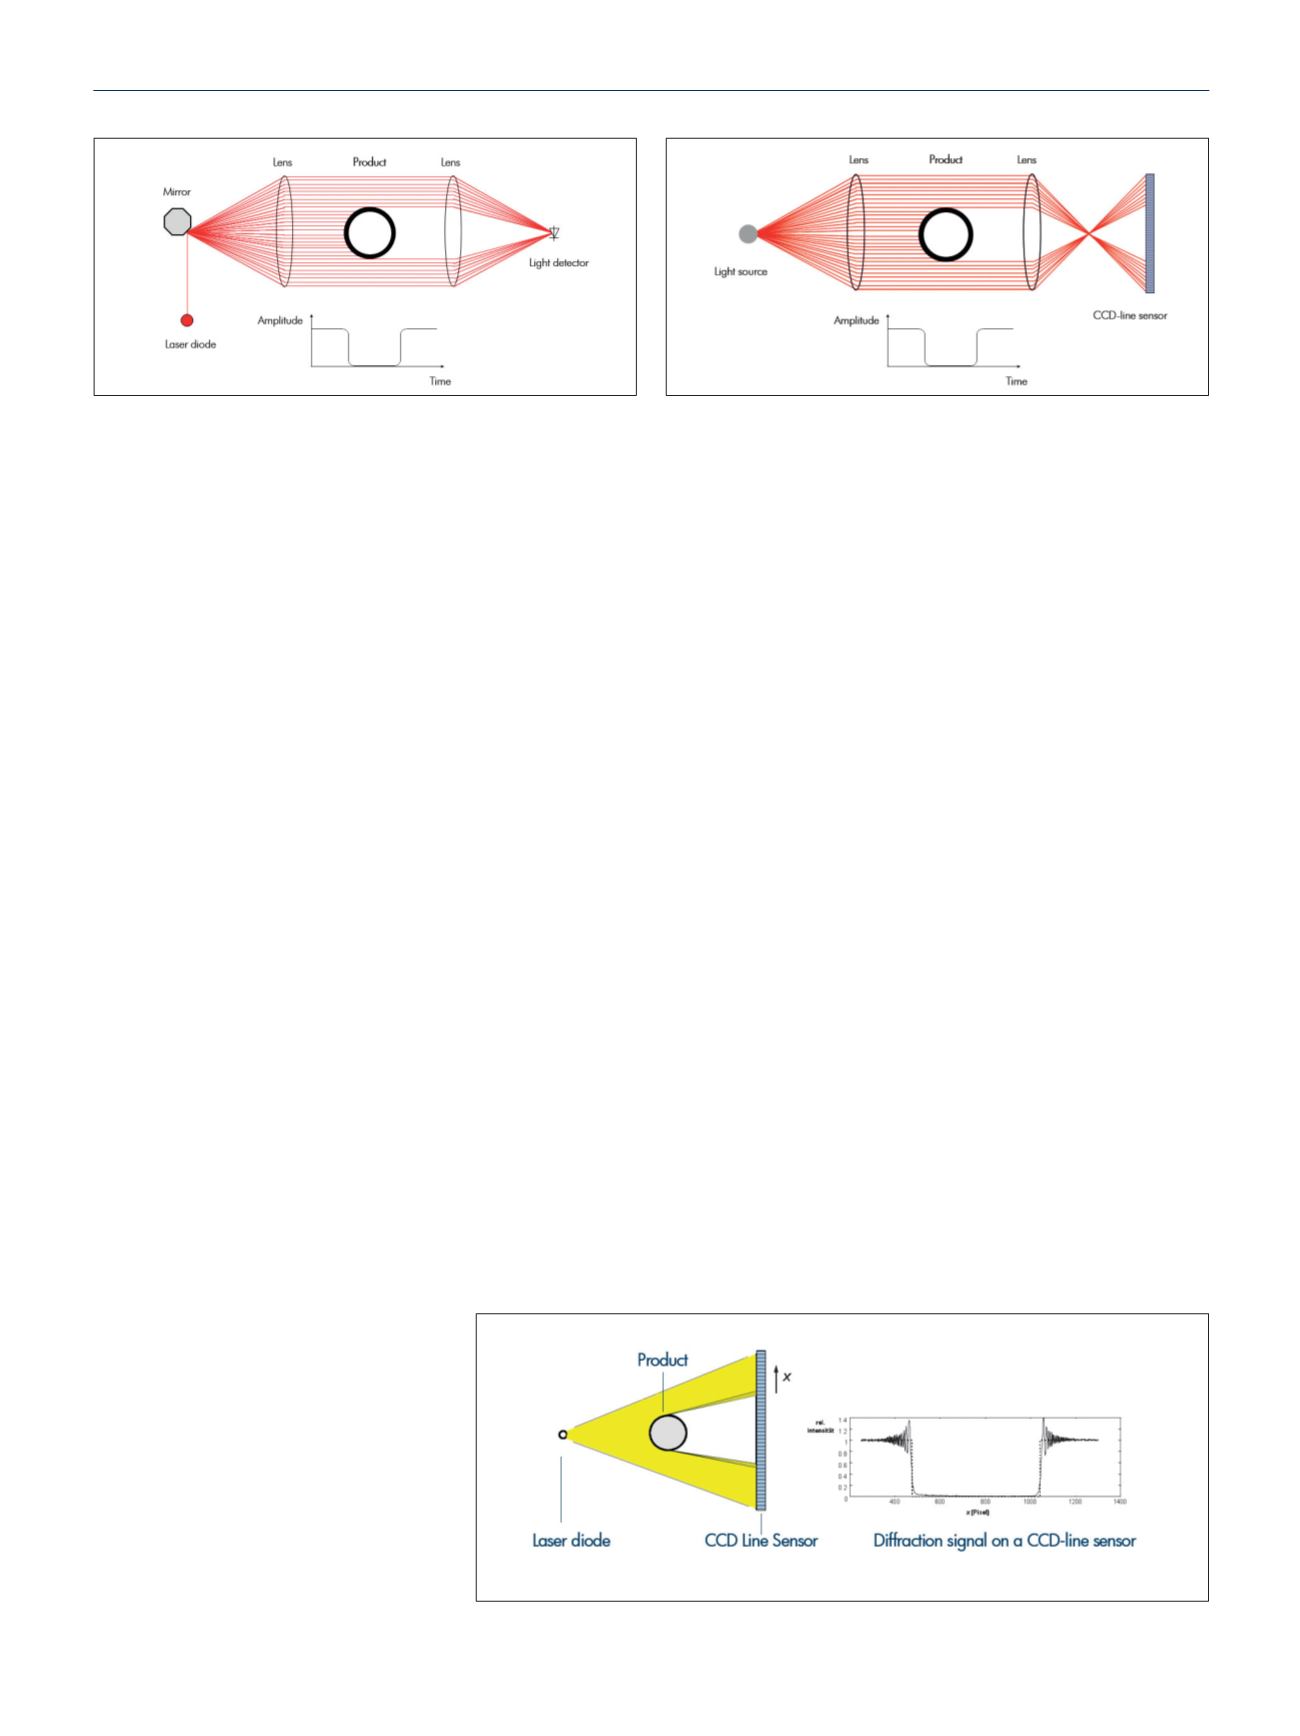
The scanning method is based on a rotating mirror or a
rotating disk, whereby a laser beam scans across the mea-
suring field. In-between the rotating mirror and the light
sensor, two lenses are arranged. The first lens diverts the
laser beam almost parallel across the measuring field
while the second lens directs the light beam onto a light
sensitive detector. The product is arranged between these
two lenses and disrupts the laser beam, while it is scanned
across the measuring field. Therefore, the product diam-
eter is calculated by comparing the time the laser beam
needs to pass the whole measuring field with the time the
laser needs to scan the complete product surface. In this
case, time equals the diameter (Fig 1). The measuring rate
depends on the rotation speed of the mirror. An increase
of the measuring rate is made possible by the use of a
polygon mirror. This highlights the problem that the mir-
ror surfaces need the exact same perfect surface finish.
Often, an averaging from several measurements is neces-
sary to achieve a reasonable accuracy.
„CCD line sensor systems“
There are two measuring methods for the CCD line sen-
sor technology prevalent. The first method is based on a
laser beam that is focused on one line sensor using op-
tics (lenses). By counting the darkened diodes from the
shadow image of the object, the diameter is determined.
The advantage of this method is the omission of moving
parts, but the costs for the lens are high (Fig 2).
The second approach is an intelligent method for which a
high-resolution CCD line is directly illuminated by a laser
and the diameter is calculated from the diffraction fringe.
The measuring rate is extremely high and only limited by
the chosen CCD line sensor. The advantages of this sec-
ond method are the omission of the expensive lenses as
well as moving parts.
The main difference between scanning and the line sen-
sor technology is that the CCD line sensor technology
works solely digitally and does not need moving compo-
nents. Therefore, accuracy, repeatability and measuring
rate are higher and a calibration is not necessary. Gauge
heads that work with the line sensor technology measure
the diameter in two or three planes. They are capable
of measuring opaque as well as transparent products
from all kinds of material with a diameter from 0.05 to
500 mm. In addition, some models offer up to 5,000 mea-
surements/per axis/ per second and therefore, as well a
reliable detection of lumps and neckdowns.
Technologies for the measurement of diameter, wall
thickness and eccentricity
For applications where a diameter measurement is not suf-
ficient, manufacturers of hoses and tubes use measuring
systems that additionally measure the wall thickness and
Pic. 2: Scanningmethod without rotatingmirror, with CCD-line sensor
Pic. 1: Scanning method with rotating mirror
Pic. 3: CCD line sensor
measuring principle
and analysis by
diffraction analysis
without optics and
moving parts


